Importing Master Data from Microsoft Excel File
Business Requirements
A. You are implementing an SAP Business One system for a client. You have given the client the appropriate import excel templates for the item and business partner master data. The client has returned the spreadsheet with over 10,000 records for both the item and business partner master data after a thorough clean up. Because of the large volume of data involved, you don't want to enter it manually into the system. Furthermore, you want to upload it in the least possible time with minimal or no error at all.
B. You already have your item master/business partner data in the SAP Business One system, however, due to the dynamics of the business, you have to update some fields in the master data, e.g. the prices of item in the item master data.
Business Solution
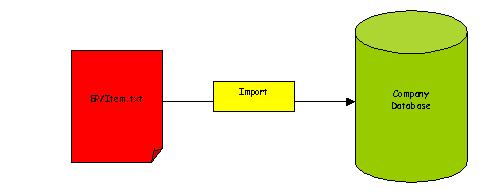
The SAP Business One import utility can be used. This import tool can be used to add new master data and also update existing master data.The import utility is one of the efficient tools that can be used to upload data from an excel sheet into an SAP Business One system. Essentially, only two types of master data can be imported using this tool. They are the item master data and business partner master data. This functionality can be accessed under
Administration > Data Import/Export > Import Data > Import from Excel
Golden Rules
1. The business partner and item codes must not contain the following characters: ! < > * ? % { } =
2. The Microsoft excel sheet must not contain a title row.
3. The Microsoft excel sheet must not contain a blank row.
4. The Microsoft excel sheet must not be open during import.
5. The Microsoft excel sheet must be saved using the .txt file format - Text file.
6. The number of character in the cells of the Microsoft Excel sheet must be less than or equal to the length of the corresponding field in SAP Business One. It must not be greater.
7. No user must be logged on to the system during the import process in a networked environment.
8. Make sure you back up the company database before import.
The Import Process
1. Follow this path in the company where import is to take place in order to access the import functionality
Administration > Data Import/Export > Data Import > Import from Excel.
2. From the data type to import drop down field, choose the master data to import
3. When the master data type (BP or Item) is chosen, you can then choose the fields you want to import. These fields correspond to the fields in the Microsoft Excel document. E.g. BP Name
4. After choosing the relevant fields and appropriate option, click the OK button
5. A screen then appears that allows you to locate the file to be imported.
6. Choose OPEN
7. The importation starts. This may take several minutes depending on the volume of data involved. The progress of the import process can be tracked on the status bar and interrupted, if need be by clicking the STOP button.
Import Status Report
A system message window is displayed after the import process. This notifies you if the import was successful or not. As a check mechanism, the number of rows imported is also displayed. This is to allow you cross check with the actual row in the excel spreadsheet. It is good practice to save the system message, especially when the import process is unsuccessful. This allows you to know and understand the cause of the failure and make amends.
Common Import Errors
Following are common errors that can be displayed and their solutions.
1. The number of the business partner or the item contains an invalid character.
Solution: Remove any of the following characters from the number of the BP/Item field in the excel sheet. ! < > * ? % { } =
2. Error 47: The Microsoft excel sheet is open
Solution: Close the Microsoft Excel sheet and try again
3. Invalid entry
Solution: Make sure that no field in the excel sheet is greater than the defined field length in the corresponding field in SAP Business One.
At this point, it is important to note that:
1. When the update existing record check box is marked, the system overwrites the prior entry in the corresponding fields. However, it is also important to state that the BP/Item codes cannot be modified. Furthermore, the type of the BP cannot be updated as long as transactions have been made against it.
2. In order to modify the items account (expenses & revenue) previous entry, the Update Accts in Existing Items checkbox is marked.
A. You are implementing an SAP Business One system for a client. You have given the client the appropriate import excel templates for the item and business partner master data. The client has returned the spreadsheet with over 10,000 records for both the item and business partner master data after a thorough clean up. Because of the large volume of data involved, you don't want to enter it manually into the system. Furthermore, you want to upload it in the least possible time with minimal or no error at all.
B. You already have your item master/business partner data in the SAP Business One system, however, due to the dynamics of the business, you have to update some fields in the master data, e.g. the prices of item in the item master data.
Business Solution
The SAP Business One import utility can be used. This import tool can be used to add new master data and also update existing master data.The import utility is one of the efficient tools that can be used to upload data from an excel sheet into an SAP Business One system. Essentially, only two types of master data can be imported using this tool. They are the item master data and business partner master data. This functionality can be accessed under
Administration > Data Import/Export > Import Data > Import from Excel
Golden Rules
1. The business partner and item codes must not contain the following characters: ! < > * ? % { } =
2. The Microsoft excel sheet must not contain a title row.
3. The Microsoft excel sheet must not contain a blank row.
4. The Microsoft excel sheet must not be open during import.
5. The Microsoft excel sheet must be saved using the .txt file format - Text file.
6. The number of character in the cells of the Microsoft Excel sheet must be less than or equal to the length of the corresponding field in SAP Business One. It must not be greater.
7. No user must be logged on to the system during the import process in a networked environment.
8. Make sure you back up the company database before import.
The Import Process
1. Follow this path in the company where import is to take place in order to access the import functionality
Administration > Data Import/Export > Data Import > Import from Excel.
2. From the data type to import drop down field, choose the master data to import
3. When the master data type (BP or Item) is chosen, you can then choose the fields you want to import. These fields correspond to the fields in the Microsoft Excel document. E.g. BP Name
4. After choosing the relevant fields and appropriate option, click the OK button
5. A screen then appears that allows you to locate the file to be imported.
6. Choose OPEN
7. The importation starts. This may take several minutes depending on the volume of data involved. The progress of the import process can be tracked on the status bar and interrupted, if need be by clicking the STOP button.
Import Status Report
A system message window is displayed after the import process. This notifies you if the import was successful or not. As a check mechanism, the number of rows imported is also displayed. This is to allow you cross check with the actual row in the excel spreadsheet. It is good practice to save the system message, especially when the import process is unsuccessful. This allows you to know and understand the cause of the failure and make amends.
Common Import Errors
Following are common errors that can be displayed and their solutions.
1. The number of the business partner or the item contains an invalid character.
Solution: Remove any of the following characters from the number of the BP/Item field in the excel sheet. ! < > * ? % { } =
2. Error 47: The Microsoft excel sheet is open
Solution: Close the Microsoft Excel sheet and try again
3. Invalid entry
Solution: Make sure that no field in the excel sheet is greater than the defined field length in the corresponding field in SAP Business One.
At this point, it is important to note that:
1. When the update existing record check box is marked, the system overwrites the prior entry in the corresponding fields. However, it is also important to state that the BP/Item codes cannot be modified. Furthermore, the type of the BP cannot be updated as long as transactions have been made against it.
2. In order to modify the items account (expenses & revenue) previous entry, the Update Accts in Existing Items checkbox is marked.
posted by Kehinde Disu @ 6:49 AM
![]()
![]()


0 Comments:
Post a Comment
<< Home